
Virtual Tour Pre-Editing Guidelines
Ingesting
Download footage from dropbox
Open davinci resolve
Open project “virtual tour 30fps template”
Go to “Media” tab
Make sure old footage is gone and both “gimbal” and “drone” folders are empty
Drop footage from downloaded “drone” folder into davinci resolve “drone” folder
Save project as “YYYY.MM.DD Property Name” which should be the same as the name from the dropbox download
Drag drone footage onto the “All Footage” timeline on “Video 2” track
Go to the color tab
Select all of the clips (these should only be drone clips)
Right click on one of the clips
> Groups
> Drone - air
> assign to groupGo back to “media” tab
Drop footage from downloaded “gimbal” folder into davinci resolve “gimbal” folder
Select all clips
Right click on a clip (with all still selected)
> Clip attributes
> “Video frame rate” to 30 and okRight click on a clip (with all still selected)
Input color space
> Sony
> Sgamut3.Cine/S-Log3Go to “Edit” tab
Drop all gimbal clips onto “All Footage” timeline on “Video 2” track
Drop all gimbal clips onto timeline
Delete the audio

After ingest. Drone footage is the left group and the gimbal footage is on the right.
Ordering clips
Separate clips by area and color them using the list below. If there’s an area not listed, just choose a different color and put it toward the back.
Orange - Exterior entrance and monument sign footage (drone and gimbal)
Yellow - Lobby
Green - Gym/fitness center
Teal - Pool
Purple - Model apartment unit
Pink - Second Model apartment unit if there is one
Teal - Second pool if there is one
Brown/beige - Pet park, playground, tennis court
When finished with this stage, the timeline should look something like this
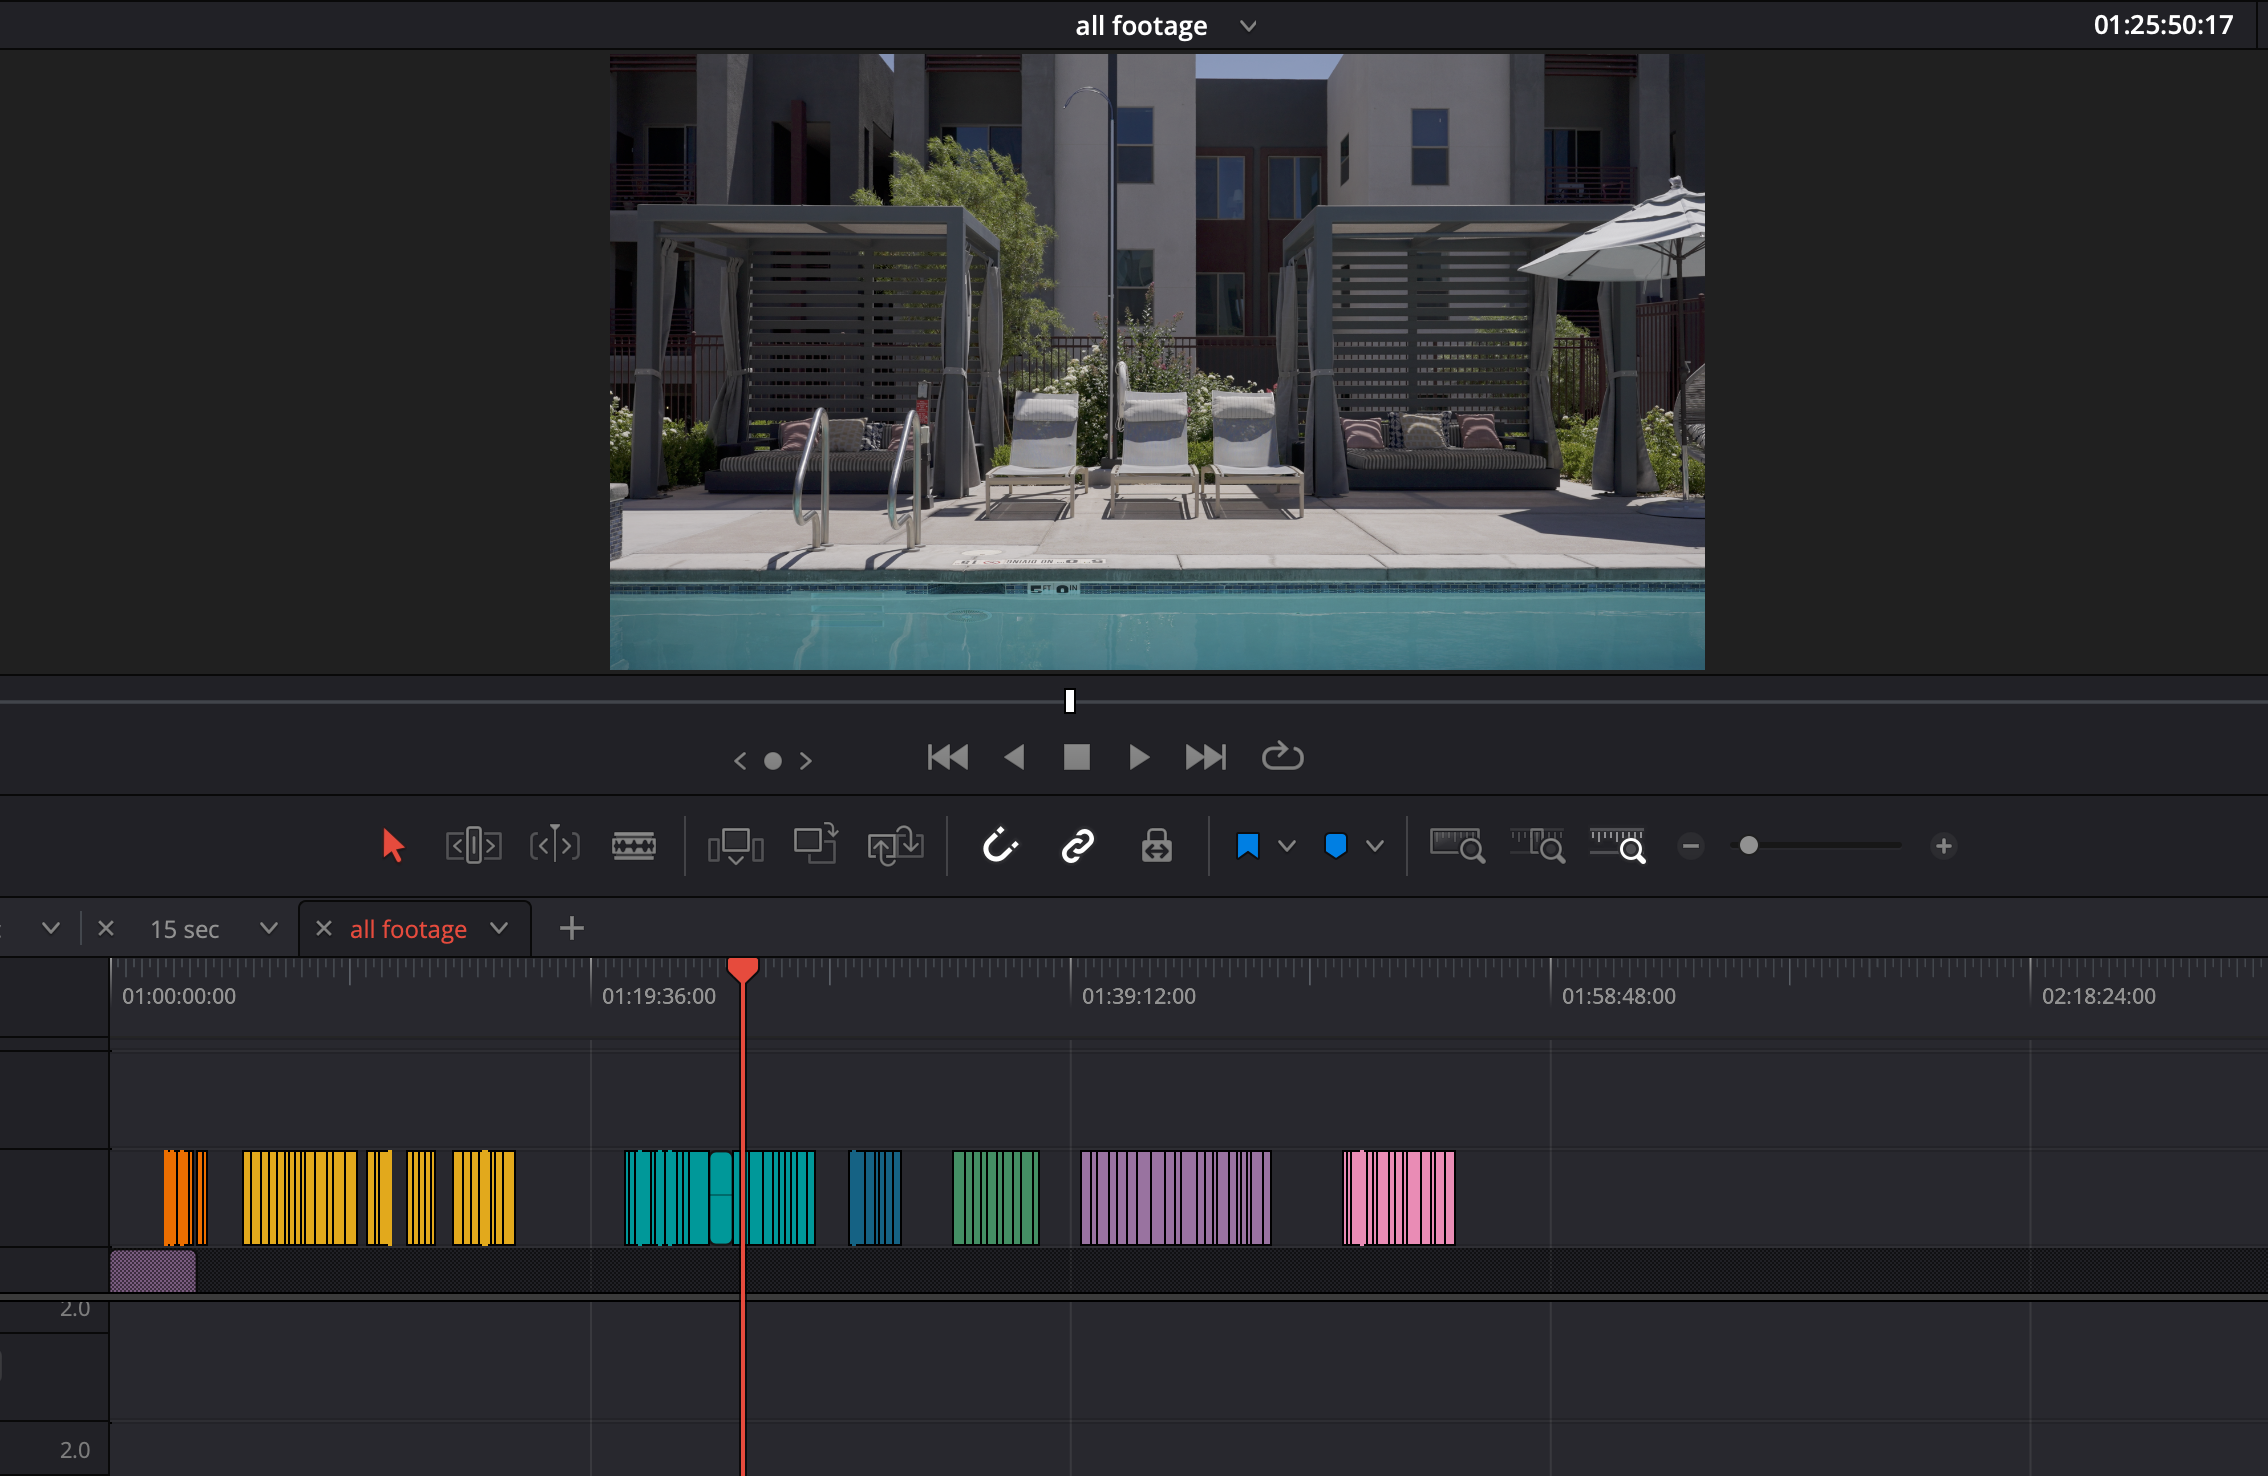
After color coding and grouping.
Trimming clips
At this stage, I would like the excess trimmed off of the clips. There’s usually a little bit at the beginning and/or the end that is not usable and needs to be removed.
Also, I’ll often do a movement forward and then reversed in the same clip. Please split those so that they are two separate clips and reverse the reversed clip so that it plays forward.
This should be pretty quick process, no need to be too precise. If you’re not sure, you can leave a bit too much of the clip instead of trimming off too much.
Finished
That’s it! When you’re done, just export the project (File > Export Project…) and drop it back into the dropbox folder. Send me an email to let me know and I’ll take a look and send payment.